3D flooring prices and 3D floor installation
Why should you install your 3D floor designs yourself as 3D bathroom floor? because the 3D coverage which is purchased from a company will cost you at least 5 times more expensive than ceramic tiles and 10 times than laminate flooring. Yes, installing the 3D flooring and filling the 3D floors is really complicated process, but the price is so high.
You will be very surprised to learn that most of the 3D bathroom flooring prices accounted for the manufacture of the image! Yes, it’s true – these 3D bathroom floor murals are available on the internet and you can get yours from any online shop, but it’s difficult to find a detailed description of the 3D flooring technology itself. So, to take – and ready. How to make the base layer and how to pour that epoxy paint – this is not difficult to understand, but how to make the dolphin in the 3D bathroom floor looks alive – that’s where the secret. that’s you will learn in this article
Also Read The flooring design ideas for your House
3D floor installation stages
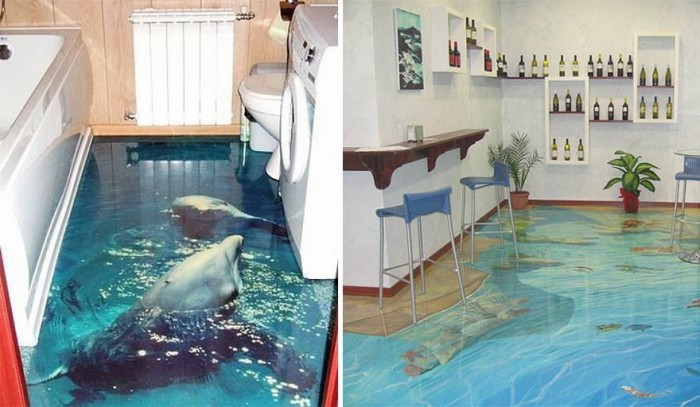
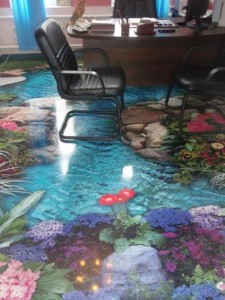
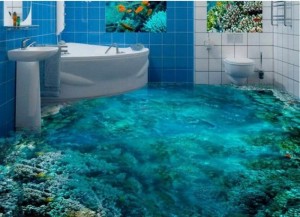
Thus, conventional methods of making the 3D floors are three: photo-realistic images are installed the floor, small items on the similarity of shells or coins, or an optical illusion. In all three 3D flooring ideas, you will perceive flooring volume. Let’s take a closer look at how to implement these ideas.
Stage I- Select a 3D floor mural image
At first, select a 3D floor mural image that has the 3D floor design you want. It can be a photo or painting which make a 3D effect. And now you need Photoshop. 3D flooring pictures must have a high resolution – at least 300 dpi.
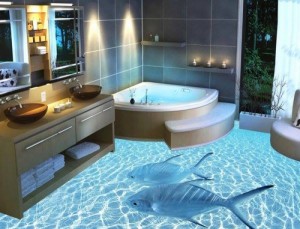
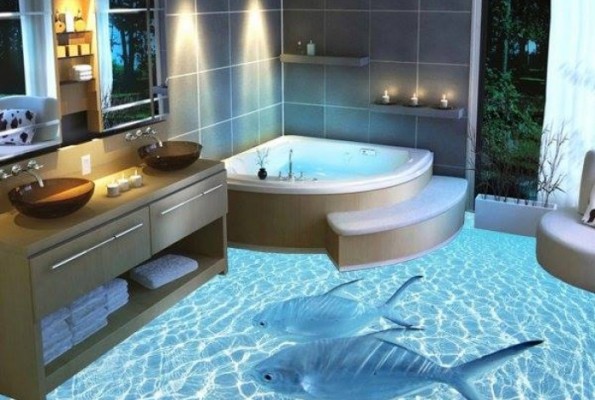
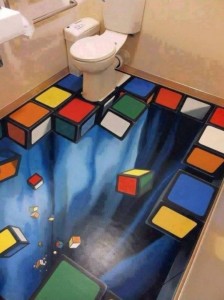
We highly recommend you not to use a 3D floor image for the with an illusion of motion. For example, something falls or wave covers.It’s really funny when near the pool in the bath guests suddenly notice absolutely natural toothy fish. But the monsters that really scare it is better not to use – it will affect negatively on the subconscious mind.
Stage II. Changing perspective of 3D floor art images
Step 1. So, the picture is selected, and the process is getting started. First of all take a photo of the room where you want to install 3D flooring – of course, with the “right” angle. But remember that many of the camera like a little distorted perspective – try to pick up the distance so that the photograph was exactly what you see with your own eyes at the threshold.
Step 2. Now in Photoshop or a similar graphics program, apply your favorite 3D floor design image on the floor photo – just the way you want it in reality. So you have created the illusion of 3D flooring. Now fasten the two images into one – now, you should see the image of the room as volumetric 3D bathroom floor design.
Step 2. Now in Photoshop or a similar graphics program, apply your favorite 3D floor design image on the floor photo – just the way you want it in reality. So you have created the illusion of 3D flooring. Now fasten the two images into one – now, you should see the image of the room as volumetric 3D bathroom floor design.
Step 3. Now cut the everything in the photo except the floor with a picture. To complete the 3D bathroom flooring effect you can do it like a trapezoid: the bottom (front) extended at the top (behind) the restriction – because that is how we see the room.
Step 4. Using the tool “Perspective” to make a correct the trapezoid. If you do not have coped with such a function – just drag it in the usual editor to make narrowest part. now the 3D floor murals are ready, save it.
 |
| how to apply 3D images on 3D bathroom floor with Photoshop |
If you experience difficulties in preparing the 3D flooring design picture, or do not know how to use graphics software – refer to any designer friend, or find a freelance designer.
Stage 3- Printing the 3D bathroom flooring design image
So, as soon as the required file of the 3D bathroom floor mural is already on your flash drive, contact any agency of printing. Why there? Firstly, they have experience with similar graphics, and secondly, you need to fill material under the floor, which does not lose its properties and color when applying a varnish or a transparent epoxy resin flooring coating.
Tip: be sure to print at first the same image of the 3D bathroom flooring design, but on plain paper, black and white – to put on the floor and assess whether the correct angle distortion, and indeed seems the same volume and the dolphin alive. If needed, adjust the perspective. And only then – you will pay for the main image of the 3D flooring murals you will use in your bathroom floor.
Stage IV. preparing the base layer
Most importantly, what you should not miss in any way -it should not to be any stain of oil, grease, detergent or bitumen on the old concrete base . Clean oil stains from its full depth with milling, grinding or cutting.
Stage V. Finishing coat
Which material to use in the coverage of the 3D flooring designs for the bathroom? We recommend the most suitable coating for this is polyurethane varnish PUR Aqua Top (M or SG), which is the most stable of all known, and therefore your 3D floor designs will never fade. you should make two layers under the 3D bathroom floor mural, each layer take around 4 hours to dry.
Use a special glue to paste the photo on the floor to make a 3D bathroom flooring and then use a abrasion-resistant coating layer.